Inviting your team
Give the treasurer, church office and group leaders their own login.
Who can do this: Administrators
Everyone gets their own login, so you can see who did what, and each person only sees what their role needs. Never share one login between people.
Step 1: Open the Team page
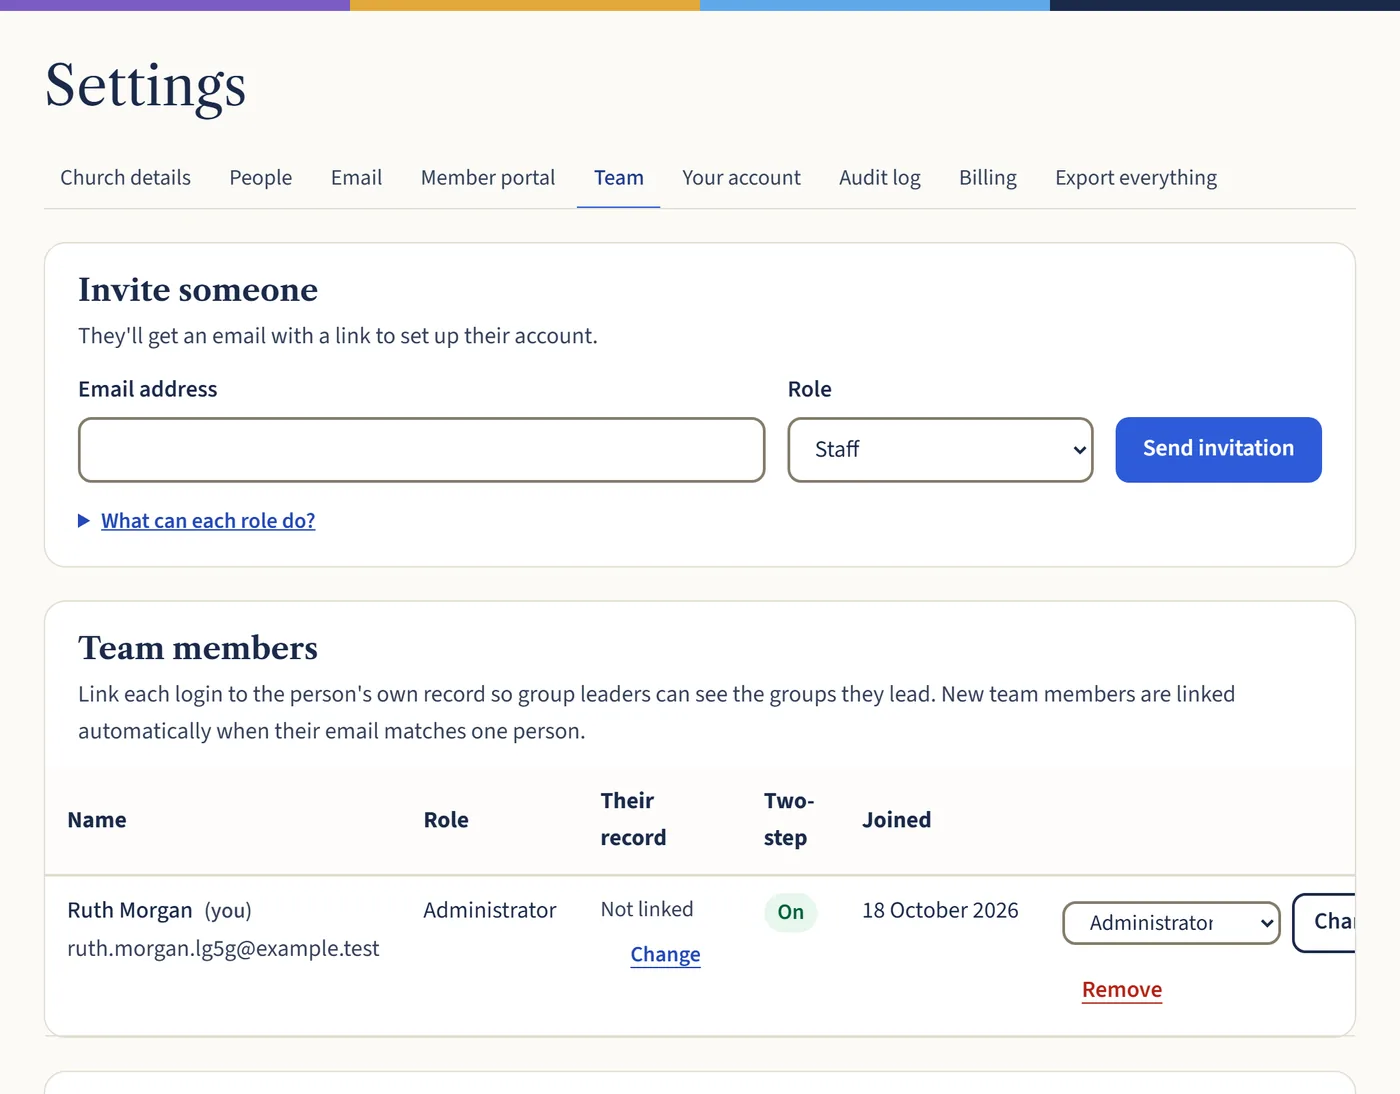
Go to Settings, then Team. You’ll see everyone who already has a login, and a box to invite someone.
Open a larger view (opens in a new tab) Step 2: Send the invitation
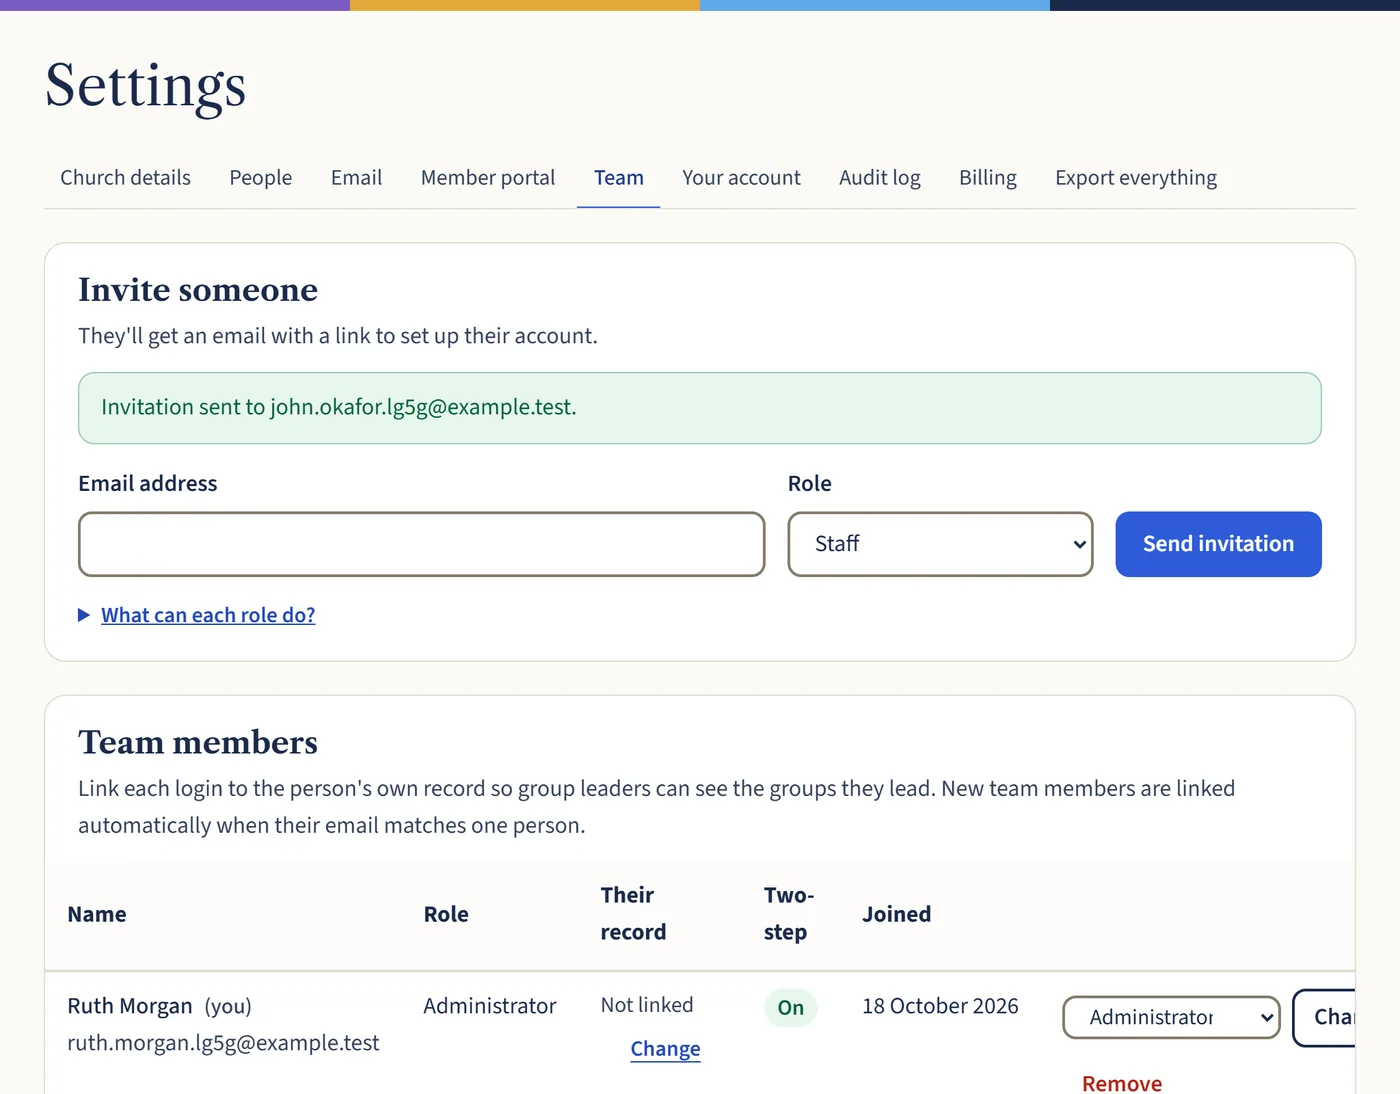
Type their email address, choose their role and select Send invitation. Not sure which role? See Who can see what.
You’ll see a message saying the invitation has been sent.
Open a larger view (opens in a new tab) Step 3: They accept it
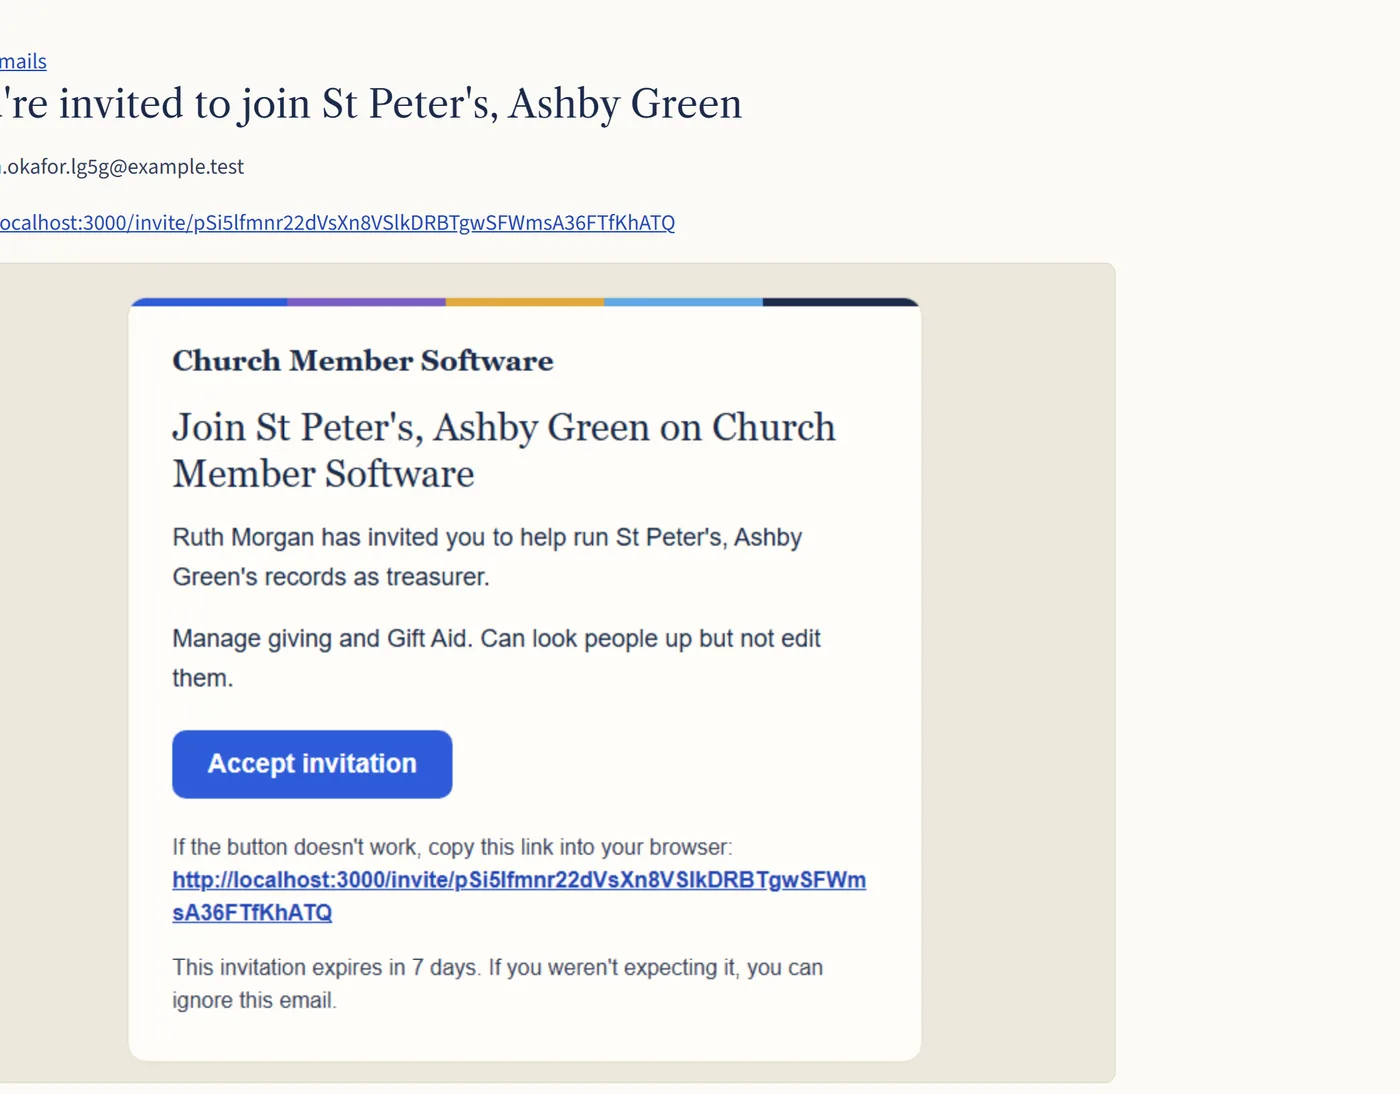
They’ll get an email telling them who invited them and what their role lets them do. They choose Accept invitation and set their own password. The invitation works for 7 days.
Open a larger view (opens in a new tab)
What happens next
Group leaders: link their login to their own record on the Team page (under Their record), so the app knows which groups they lead.
Safeguarding leads: tick Safeguarding lead next to their name so they can see DBS records. They’ll need two-step sign-in.
To change someone’s role, choose a new one next to their name. To take away their access, choose Remove.