Tags, key dates and custom fields
Set up the labels and extra details your church wants to keep.
Who can do this: Administrators set them up. Administrators and staff use them.
Step 1: Open the People settings
Go to Settings, then People. Here you choose your membership statuses (such as Member and Regular attender), tags, key dates, note categories and custom fields.
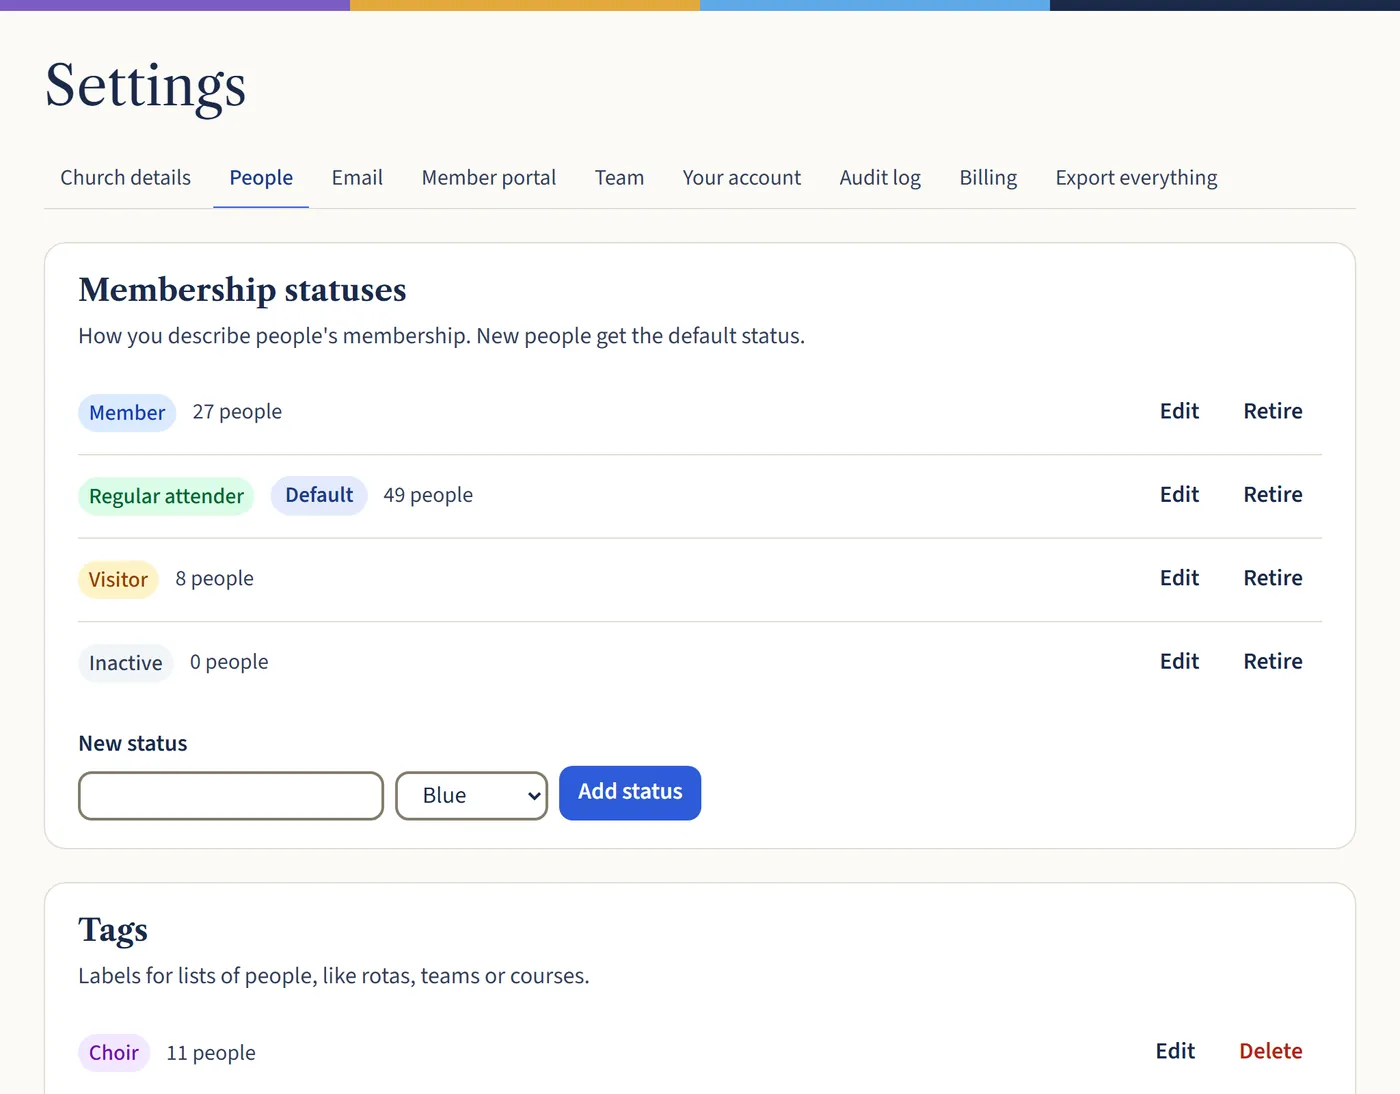
Open a larger view (opens in a new tab) Step 2: Add tags and key dates
Tags are labels for groups of people, such as Choir or Electoral roll. Type a name, pick a colour and choose Add tag.
Key dates are milestones such as baptism or becoming a member. Add the kinds you want to record the same way.
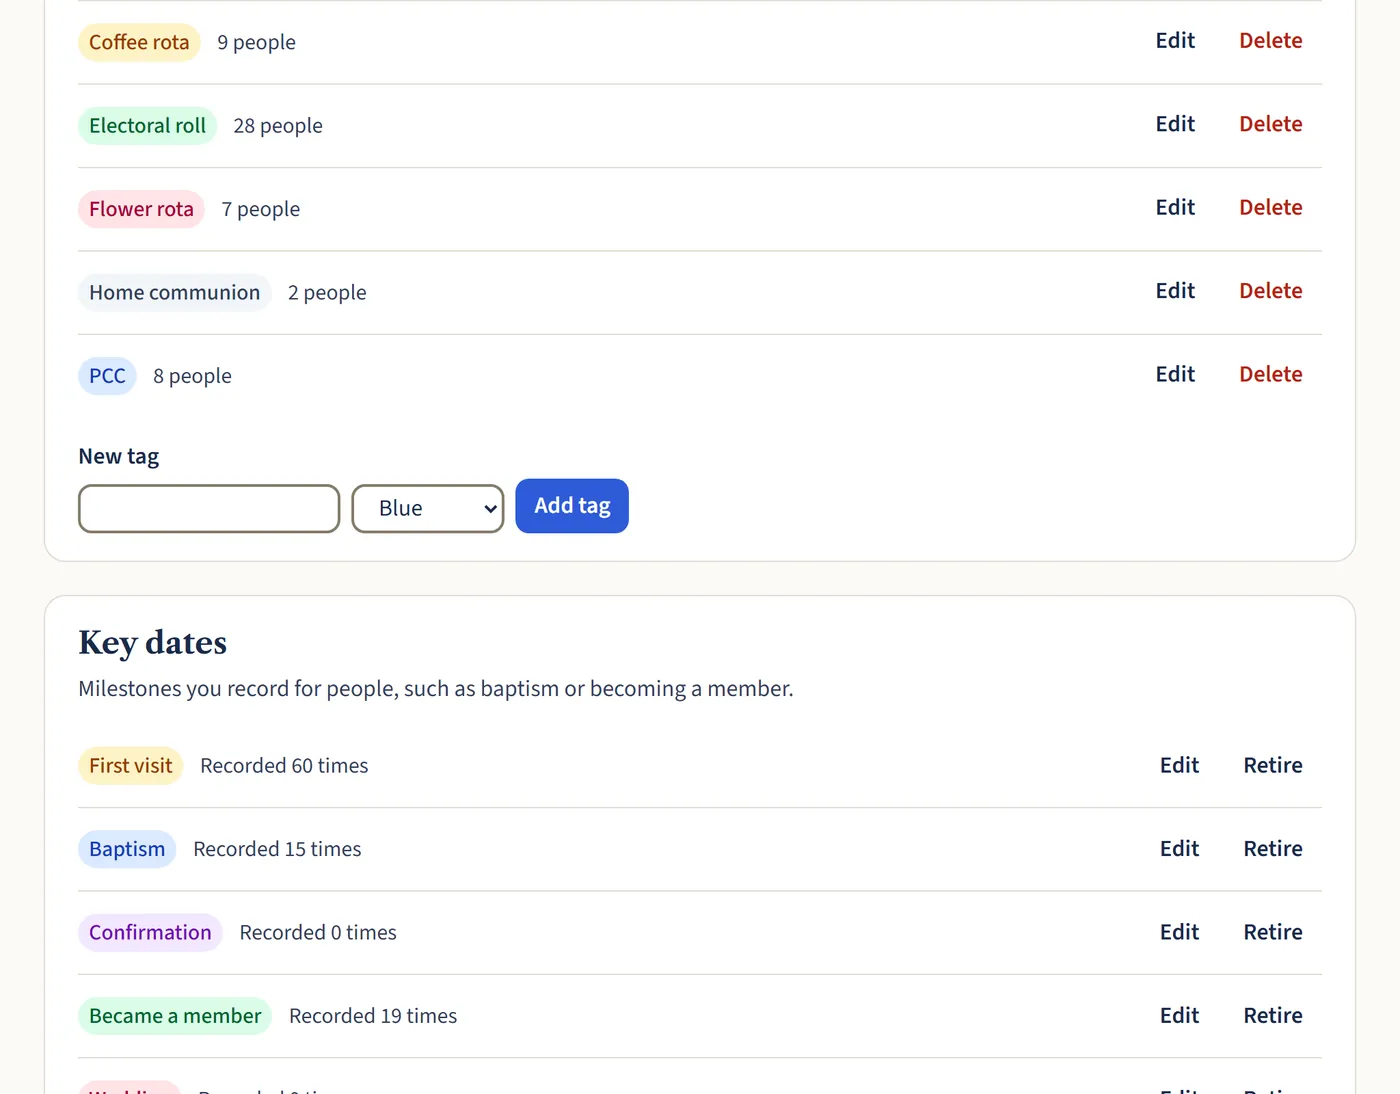
Open a larger view (opens in a new tab) Step 3: Add custom fields
Under Custom fields, add anything else you need, grouped into sections such as Emergency contact. You can add a section of your own, and hide fields you no longer use.
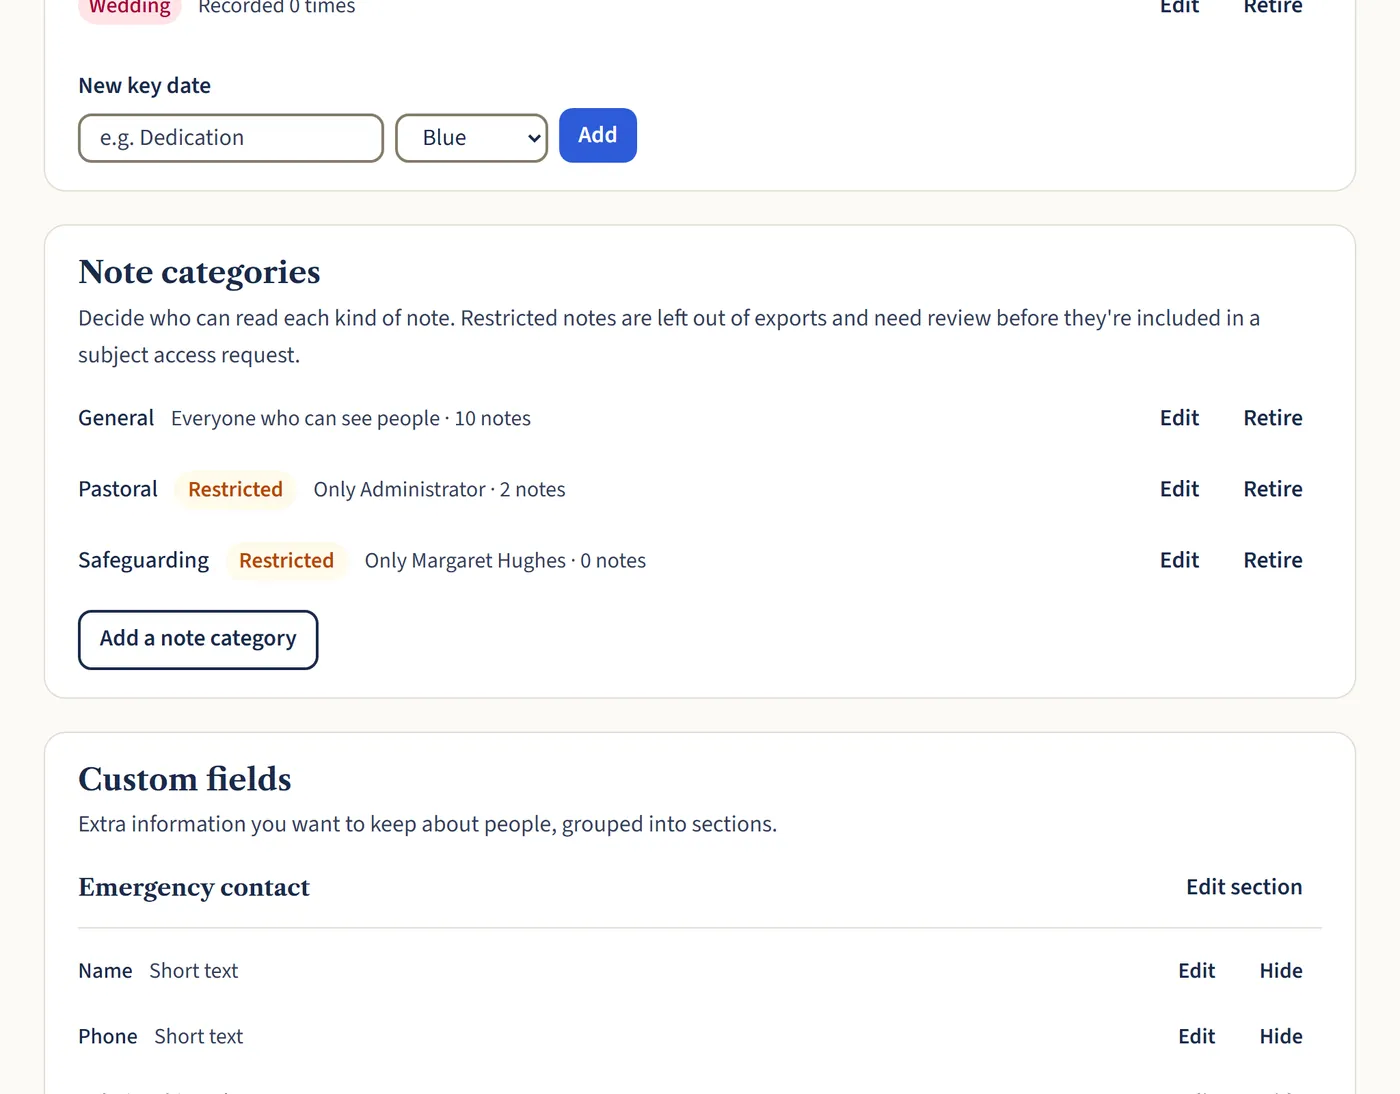
Open a larger view (opens in a new tab) Step 4: Use them on a person’s record
On anyone’s record, type in the Tags box and choose Add, or choose Add a date under Key dates. To tag lots of people at once, tick them on the People list and choose Add tag.
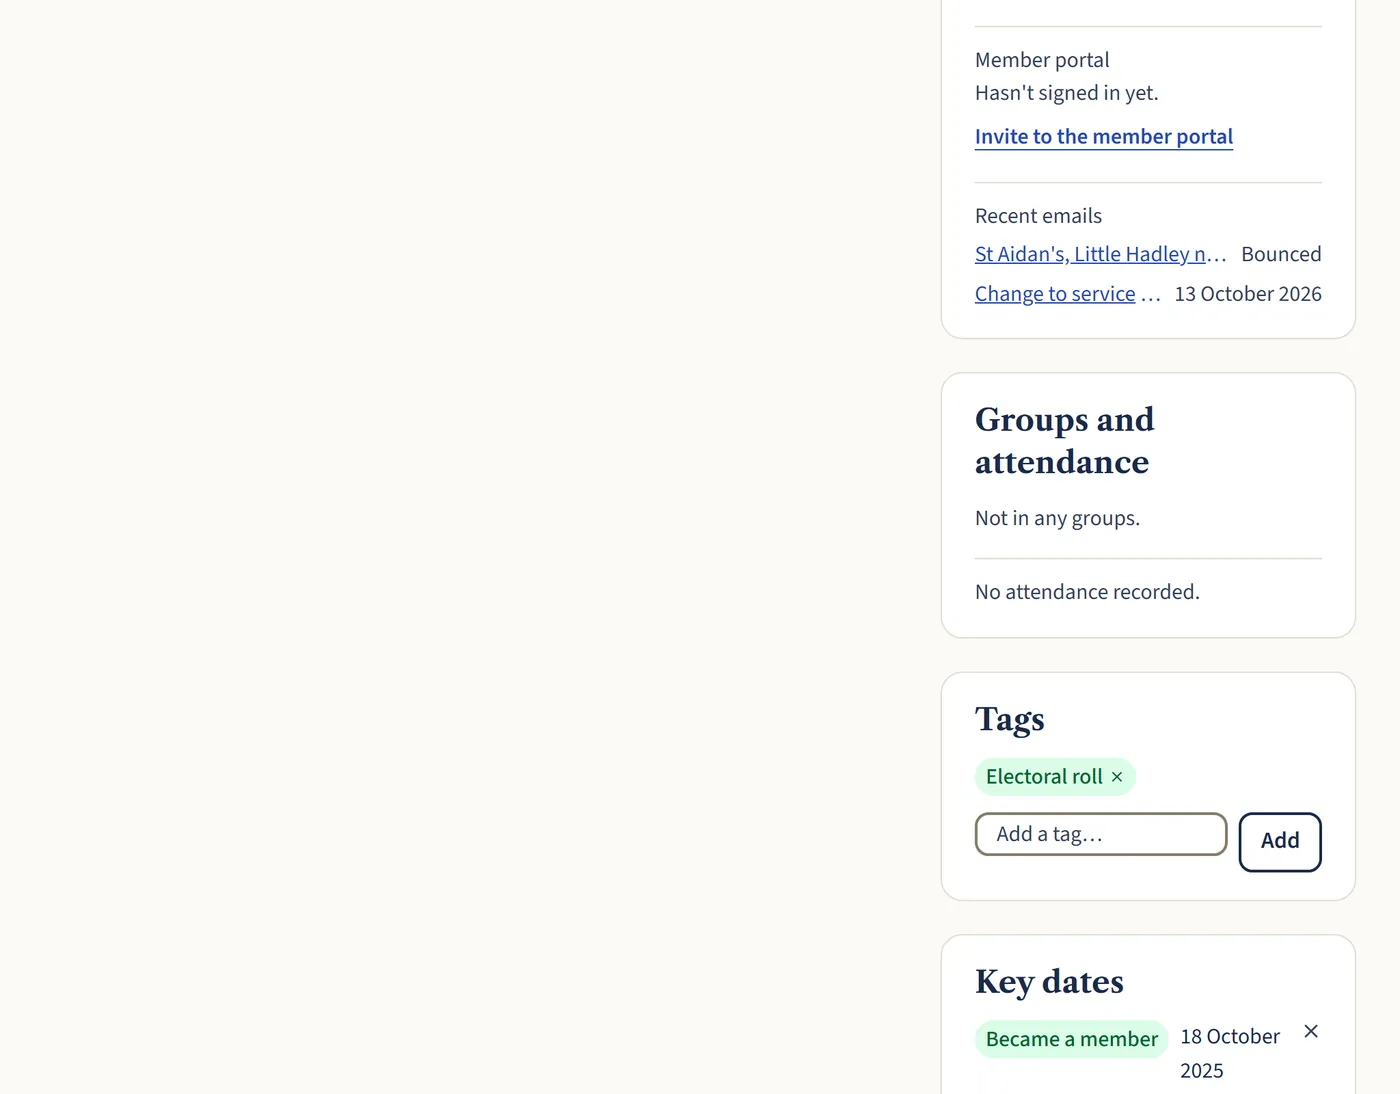
Open a larger view (opens in a new tab)